Cleaning Dogs Ears
Quickly & Efficiently
Cleaning dogs ears can prevent ear infections and other dog ear problems as long as you do it properly. By properly, I mean without pushing the dirt down into the ear canal, but remove it entirely instead! It also means cleaning both the ear canal (inside of the ear) and ear flap (outside of the ear).
Unfortunately it's sometimes a necessary chore but, my gosh, it's not always easy, is it? Best way to do it, is to be organized and get through it as quickly and efficiently as possible. Here's what I have found works best.
When To Clean Your Dog's Ears
First, you only need to clean your dog's ears if there's a problem, or, if they have a ton of gunk in there. Keep an eye on what's happening in there to know if they could do with a clean.
Preventing ear problems in dogs starts with monitoring and proper cleaning of your dog’s ears, but only clean if necessary. Keeping the ears dry inside will go a long way to preventing a lot of problems too. In fact, it's a moist, damp, environment that allows a lot of yeast and bacteria to grow that causes the problems. So if you do one thing with your dog's ears, make sure it's keeping the insides dry!
Before Getting Started
Before you even get started, if you have a dog that squirms around a lot it will help if you get him used to his ears being handled beforehand. Just spend a few minutes each night for about a week, going through the motions of cleaning his ears without actually using any solutions or doing any cleaning. Here's what to do:
- Have your dog sit in front of you
- Touch his ear, then give him a treat
- Massage the base of his ear, then give him a treat
- Repeat steps 2 & 3 for longer duration each time
That should help desensitize your dog to the process.
If you're dog is likely to snap or bite you then it would be safer if you put a muzzle on your dog to clean his ears or get your vet to do it.
The Best Method Of Cleaning Dogs Ears
So let's get started on cleaning dogs' ears!
Prepare for cleaning the ears by gathering materials and finding a place to do the cleaning. Your dog may not like this so it's best to find a small area where they can't escape; I find a bathroom or laundry room is good. If you can, have someone help to hold your dog while you clean the ear cavity.
Materials You'll Need
- dog ear cleaner
- small bowl
- cotton balls
- cotton swabs
- trash bin
- towel
- Small flash light
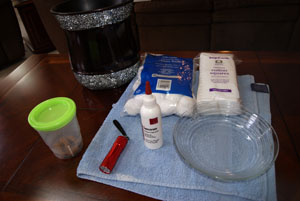
Gather your materials together and get your dog to sit or lay in front of you. It doesn't matter which, just make sure she's comfortable and will stay still. Have the towel handy then begin the cleaning.
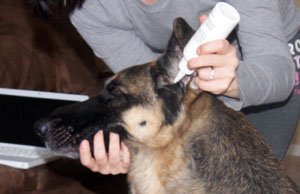
- Gently raise the ear and inspect for dog ear problems such as debris, redness or swelling.
- Also check for unusual odors or dry, cracking skin.
- Squirt ear cleaner into ear canal. If you have a dog with floppy ears, you'll need to hold the ear flap up.
- Let go of the ear flap and massage the base of the ear vigorously for a few seconds.
- Now let your dog shake her head, trust me, she will. This is where the towel will come in handy to try and limit the amount of ear cleaner that may fly out.
- Repeat with the other ear before you go onto cleaning the ear flaps.
- Pour dog ear wash into the bowl and place the cotton balls in the bowl to soak up the fluid.
- Squeeze the excess liquid out and wipe a cotton ball in an upward scooping motion of the inner ear flap.
- Discard that cotton ball and repeat the process with another cotton ball in the other ear.
- Place the towel over the dog’s ears so they can shake out the liquid, which prevents dog ear infection.
- Use a separate cotton swab to clean the folds in each ear.
- Get your flashlight and look for any debris or bits that you have missed. Make sure you do a thorough job.
- Once you are happy that both ears are clean, wipe both ears dry (canal & flap). Any dampness can lead to growth of bacteria or yeast in the ears. So its important to make sure all is dry.
What Not To Do/Use
Do not use hydrogen peroxide, rubbing alcohol, vinegar, dish soap, or any other homemade concoction that contains these ingredients, in the ear.
It's best if you purchase a commercial ear cleaner from your local pet store or vet and make sure you get one that just cleans ears. Some contain ear mite killer or antibiotics, these extra ingredients are not necessary and are mostly ineffective anyway. If in doubt, leave the ear canal cleaning to a professional. Most groomers will be happy to oblige and are proficient in cleaning dogs' ears.
If you are taking your dog to the vet for a suspected ear infection then DON'T clean the ears for three or four days prior to taking him to the vets. Your vet will need to see what's wrong and take swabs of any discharge from your dogs ears. Cleaning them will remove evidence of the problem!
Why Check or Clean Dogs Ears?
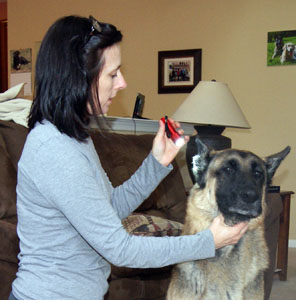
Now, given that ear problems are the number reason for vet visits, you should check your dogs' ears as part as your dog care routine.
Once a month is good, and clean as necessary. If the ears are clean, then leave them alone as regular ear cleaning is not always necessary if your dog doesn't have any of the symptoms below, or you don't see any evidence of wax buildup.
If you suspect an ear infection, schedule an appointment with your veterinarian.
Symptoms include:
- Constant shaking the head
- Dog ear odor
- Scratching the ear repeatedly
Those symptoms can also indicate problems like wax buildup or compressed hair inside the ear canal so it's best to have your vet check for sure.
Finally, cleaning dogs ears can help keep ear problems at bay but it shouldn't be done too often. Once a month at most. If your dog doesn't seem to have a problem with his ears, then leave them alone, regular cleaning isn't necessary if the ears are fine. If in doubt consult with your vet.
